
The Indexing API allows you to directly notify Google when pages are added or removed. This allows Google to schedule pages for a fresh crawl, which can lead to higher quality user traffic in quick time.
In this post, we’re going to take a look at how you can use Google’s new indexing API to get your website’s pages and content crawled immediately rather than having to wait.
Here’s why this really is worthest.
- 1-Click Indexing API plugin faster – It’s now possible for you to get your website’s schema crawled faster using Google’s Indexing API & 1-Click Indexing API plugin.
- Increase your chances of getting schema crawled before your competitor – By using this method, you can stay ahead of the pack of your competition by making sure that your site is crawled.
- Keep search results up-to-date for higher quality user traffic – We have made this process very easy by just adding up very few steps.
Note: Google recommends that We use the Indexing API ONLY for Job Posting and Live Streaming websites. During our tests, We found that it works on any type of website with great results However We should relay on google.
- Download 1-Click Indexing API Integration Plugin – Click Here
- For more details on how to download an extension for this Click Here
Add the Service Account as an owner of your Google Search Console Property
- To do this, you’ll need to register and verify your website with the Google Search Console (if you haven’t done so already) which is super easy: just follow the recommended steps to verify ownership of your property.
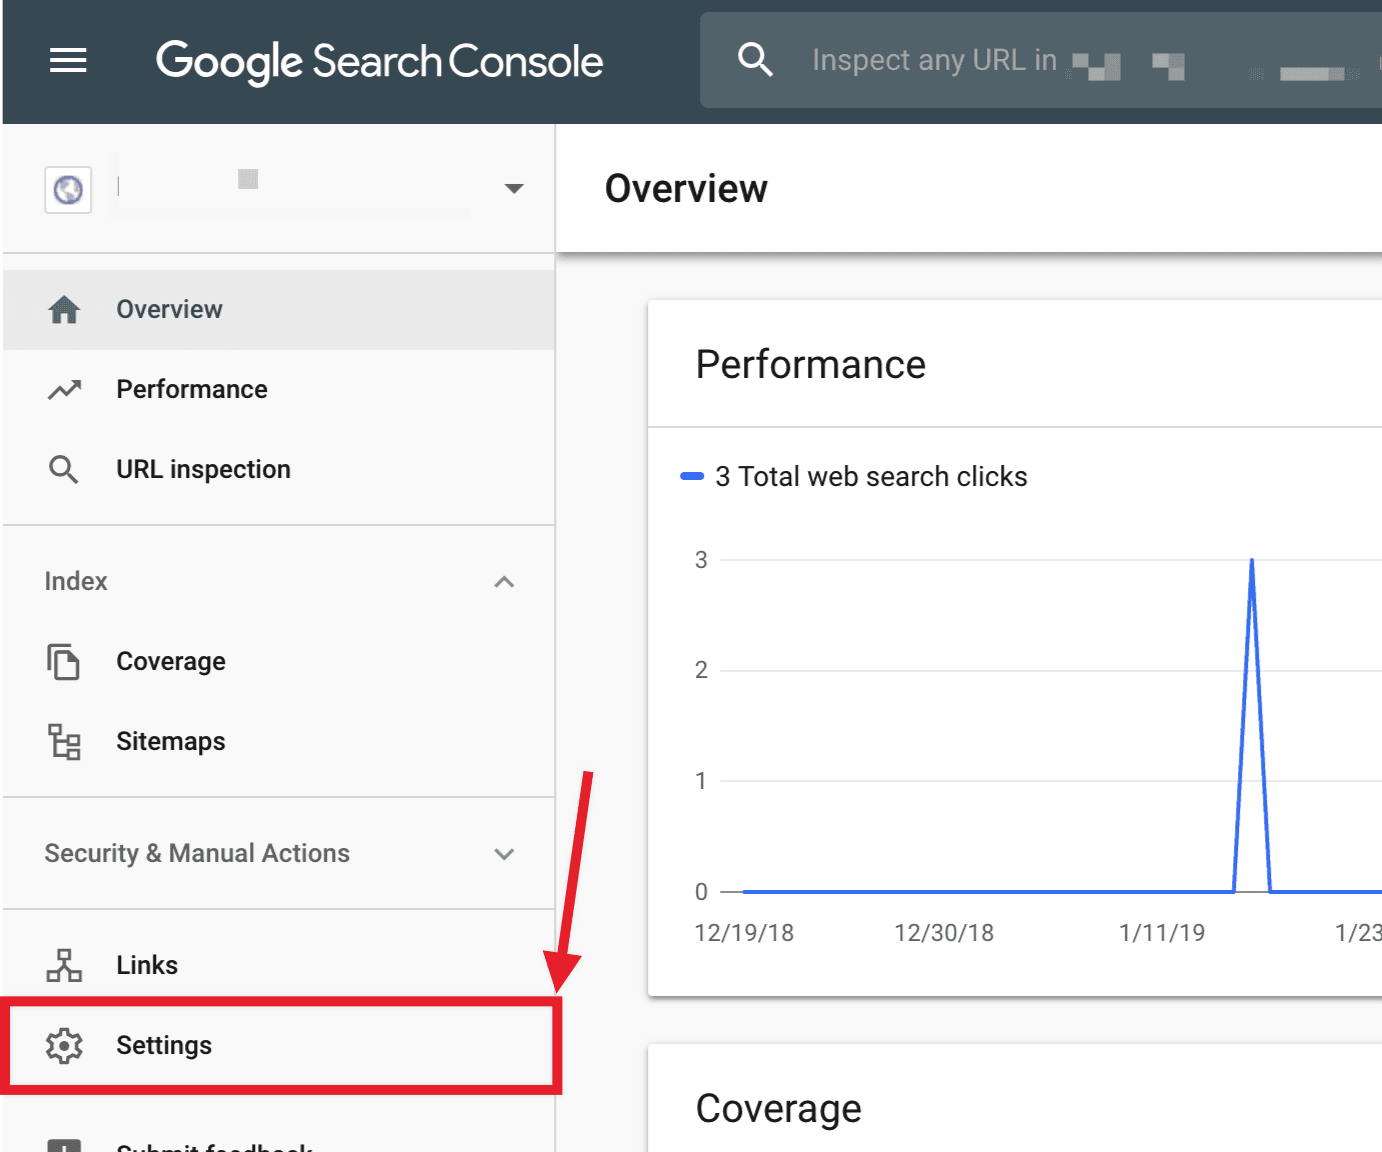
- After verifying your property, open the Google Search Console, select your property on the left (if prompted), and then click on Settings near the bottom:
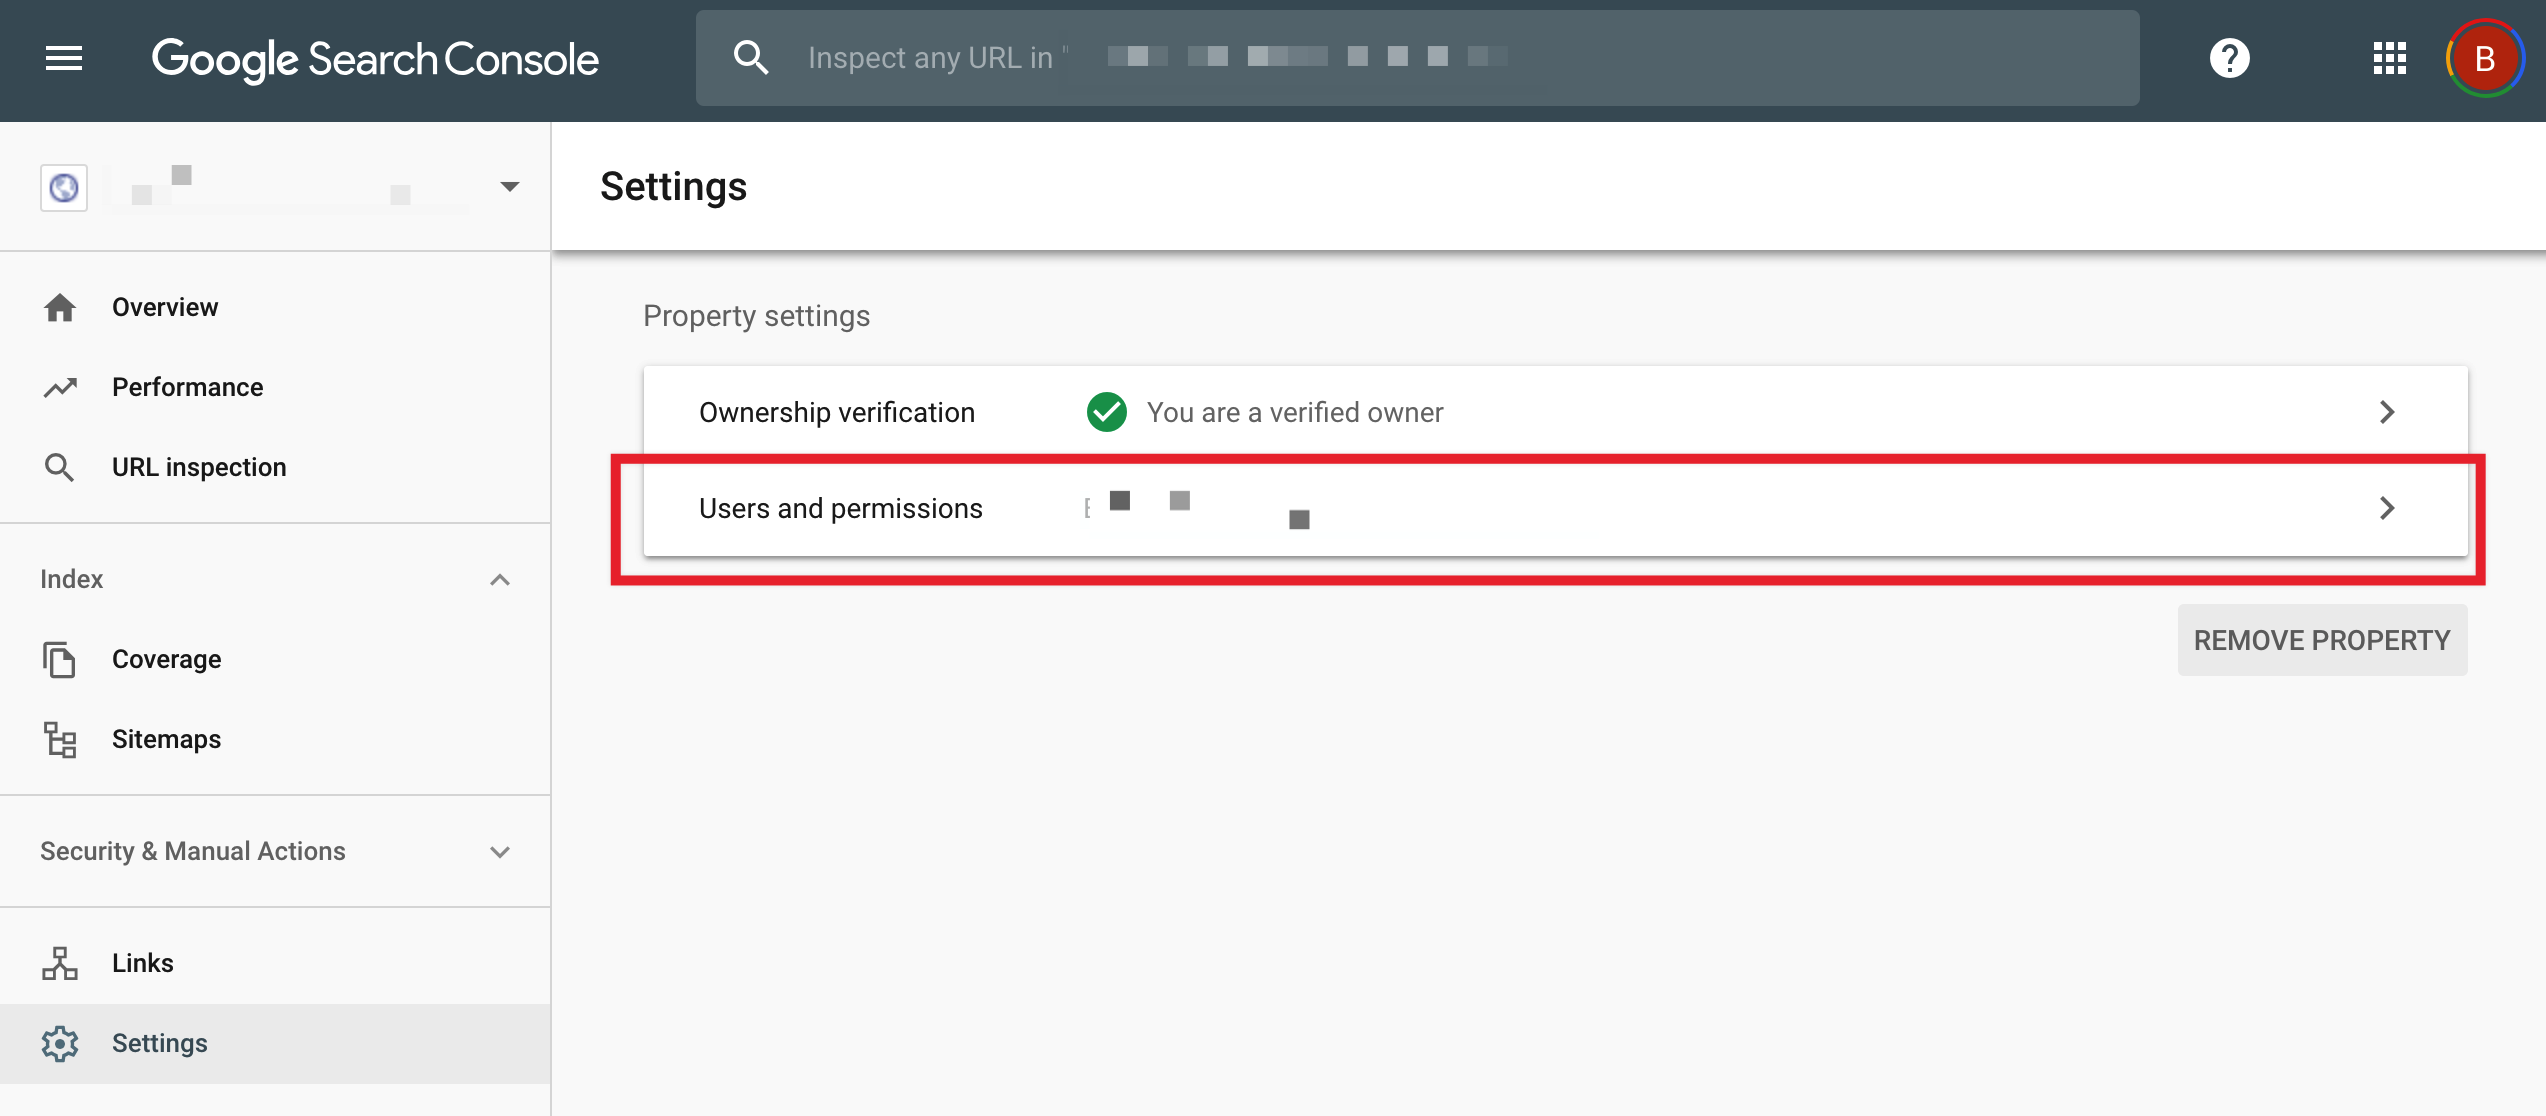
- Click on Users and Permissions:
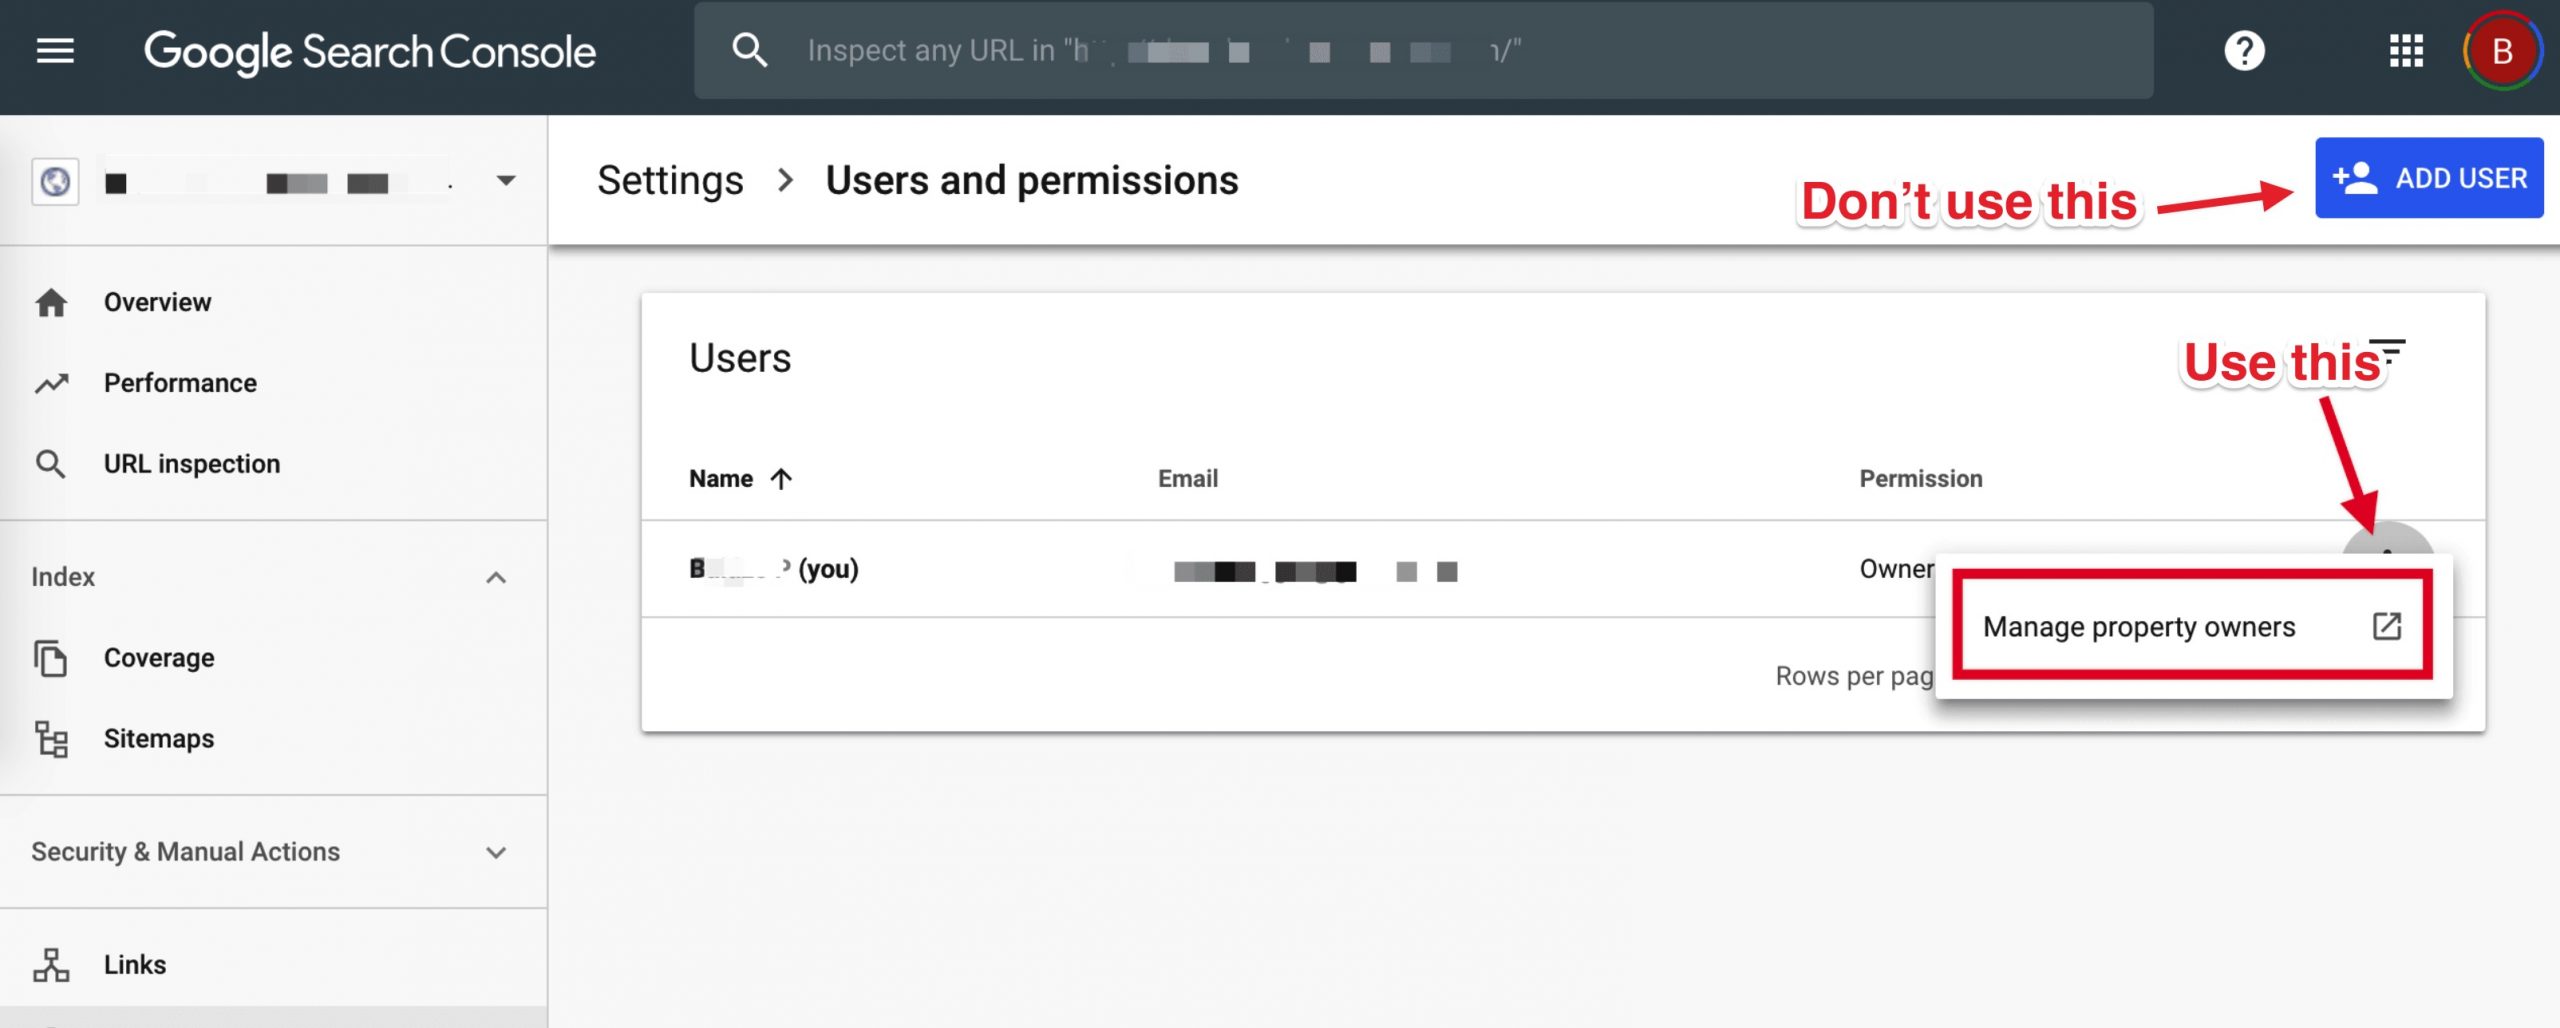
- Click on the three dots next to your account, and then click on Manage property owners:
- A page will open in a new tab. Scroll to the bottom and click on the Add an owner button in the Verified owners section:
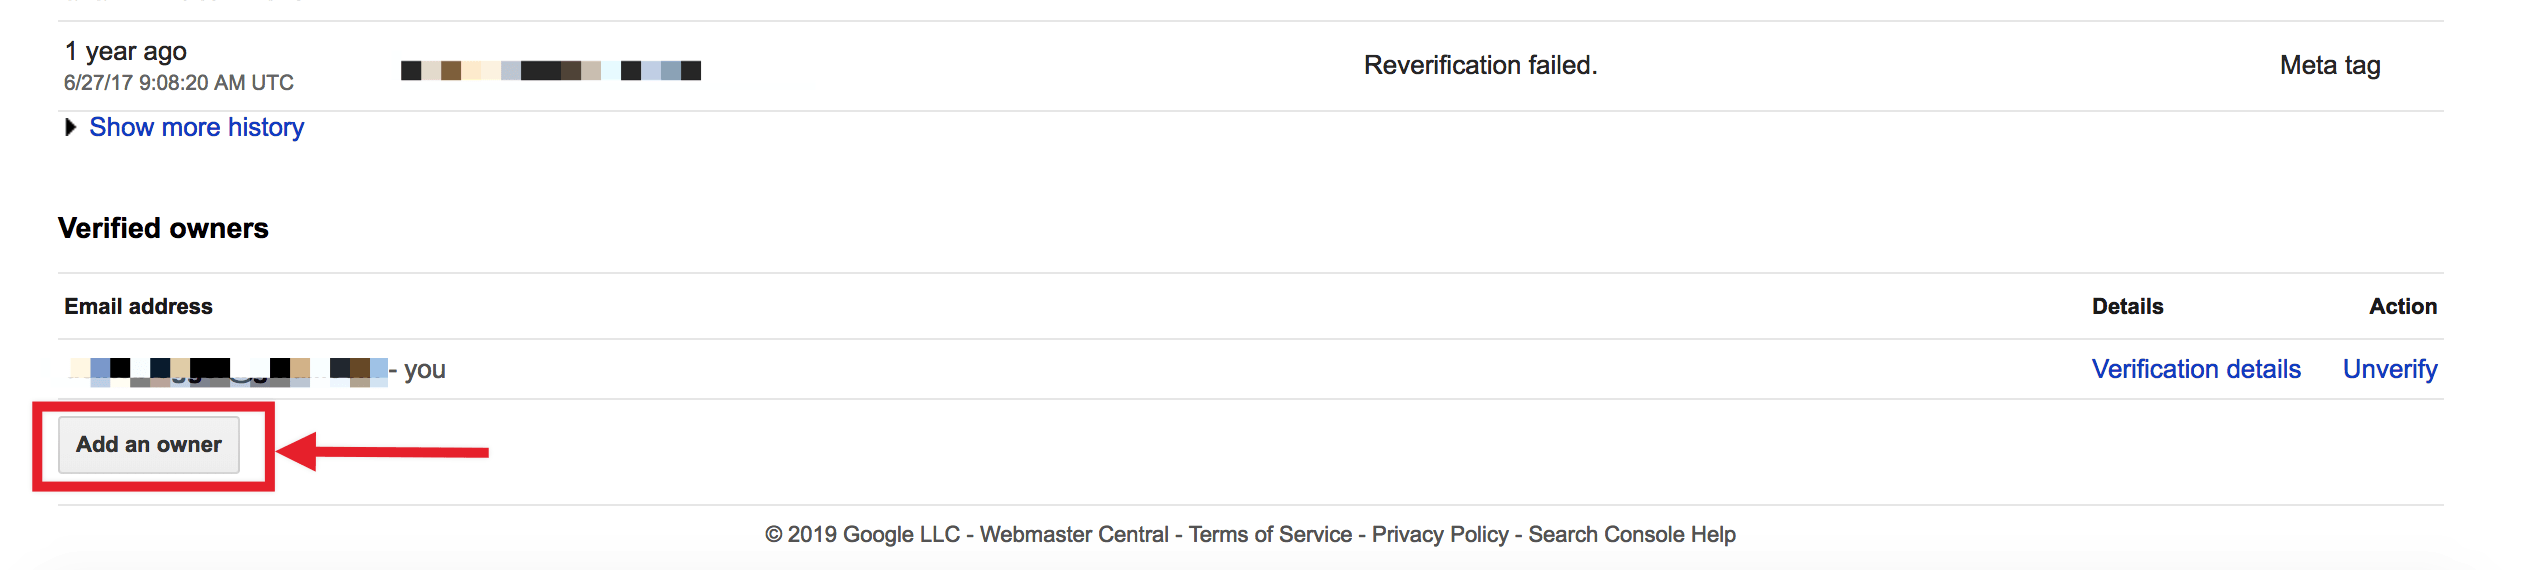
- A page will open in a new tab. Scroll to the bottom and click on the Add an owner button in the Verified owners section:

- Once you purchase our 1-Click Indexing API plugin then please Enter the Service account ID ([email protected])in the new owner’s email address field and click Continue:
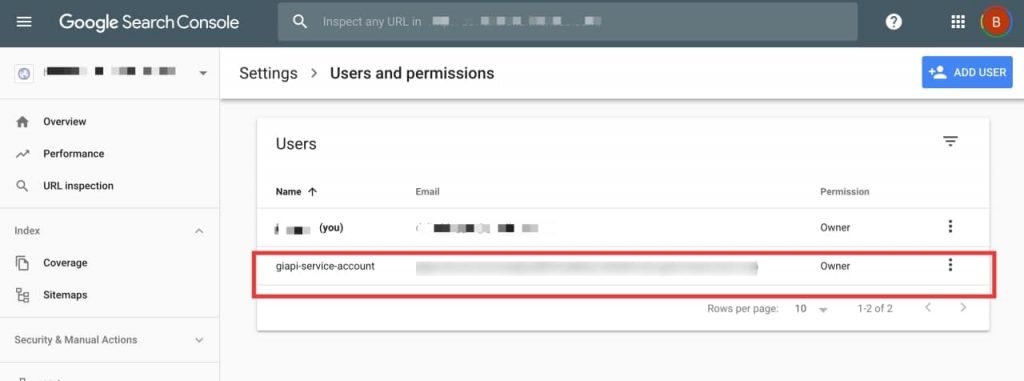
Switch back to the previous tab and refresh it. You should now see the Service account listed as a new Owner.
Now it’s time to use Google’s indexing API to get any post or page on your site indexed almost instantly.
- You will find this option in WordPress Dashboard -> Structured Data -> Settings -> Indexing-> Which Page/Post indexing you want just select/check this option, The screen should appear similar to the one below.

Enter a URL (or more) in the Instant Indexing section, and click the Send to API button.
In just a second, you should see a response from the API.
And that’s it! We hope that you were able to make great use of this guide to help you get up and running with Google’s Indexing API.
Please Note: It will take a few minutes for your website to start crawling after successful submission.
That’s it for this tutorial!
We hope it helped you. If you have any feedback or questions or do you want us to create compatibility for any other schema type which isn’t listed in our plugin then you can request us we will surely implement it as soon as possible.
Just contact us here and we are always available for you.
